
User guide
Register for a visit
Start with a QR or invitation, enter your details, then check access readiness.
Your organization settings and account permissions determine which options are available.
All screens use fictional data. QR images and setup codes are examples and cannot be used to register.
Before you start
Have the QR or invitation link provided by your destination ready. Allow camera access if you want to take a photo.
How the task works
Follow the main steps in order. Where a choice is shown, follow the branch that matches your situation.
- GuestOpen the place QR
- GuestEnter details and photo
- GuestReview and send
- SystemCheck approval rules
- Review requiredWait for staff approval
- AutomaticContinue when requirements are met
- GuestCheck access readiness
- Gate not readySee reception; do not register again
Steps
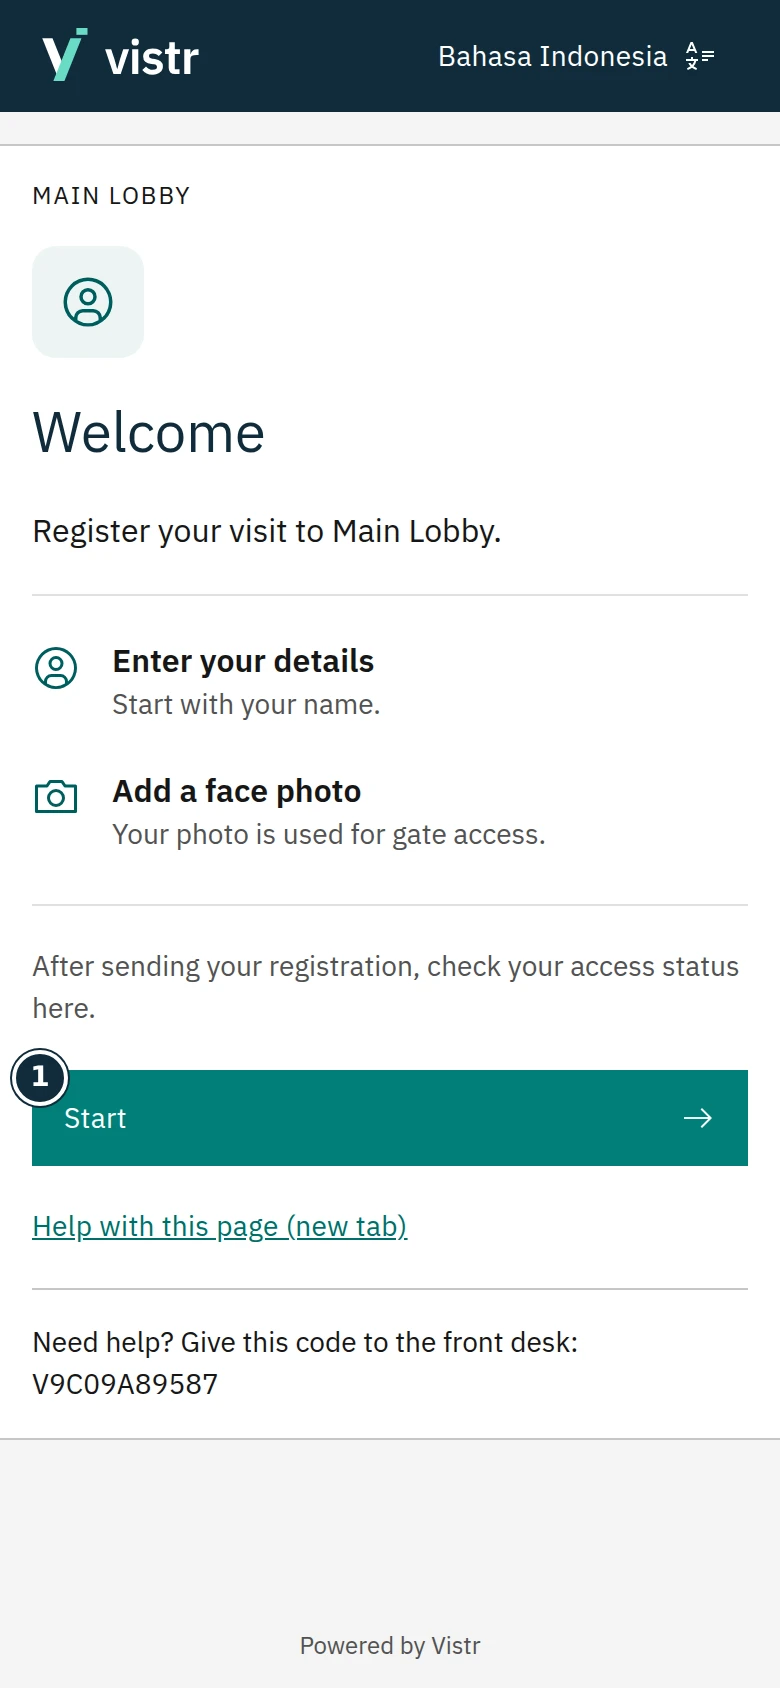
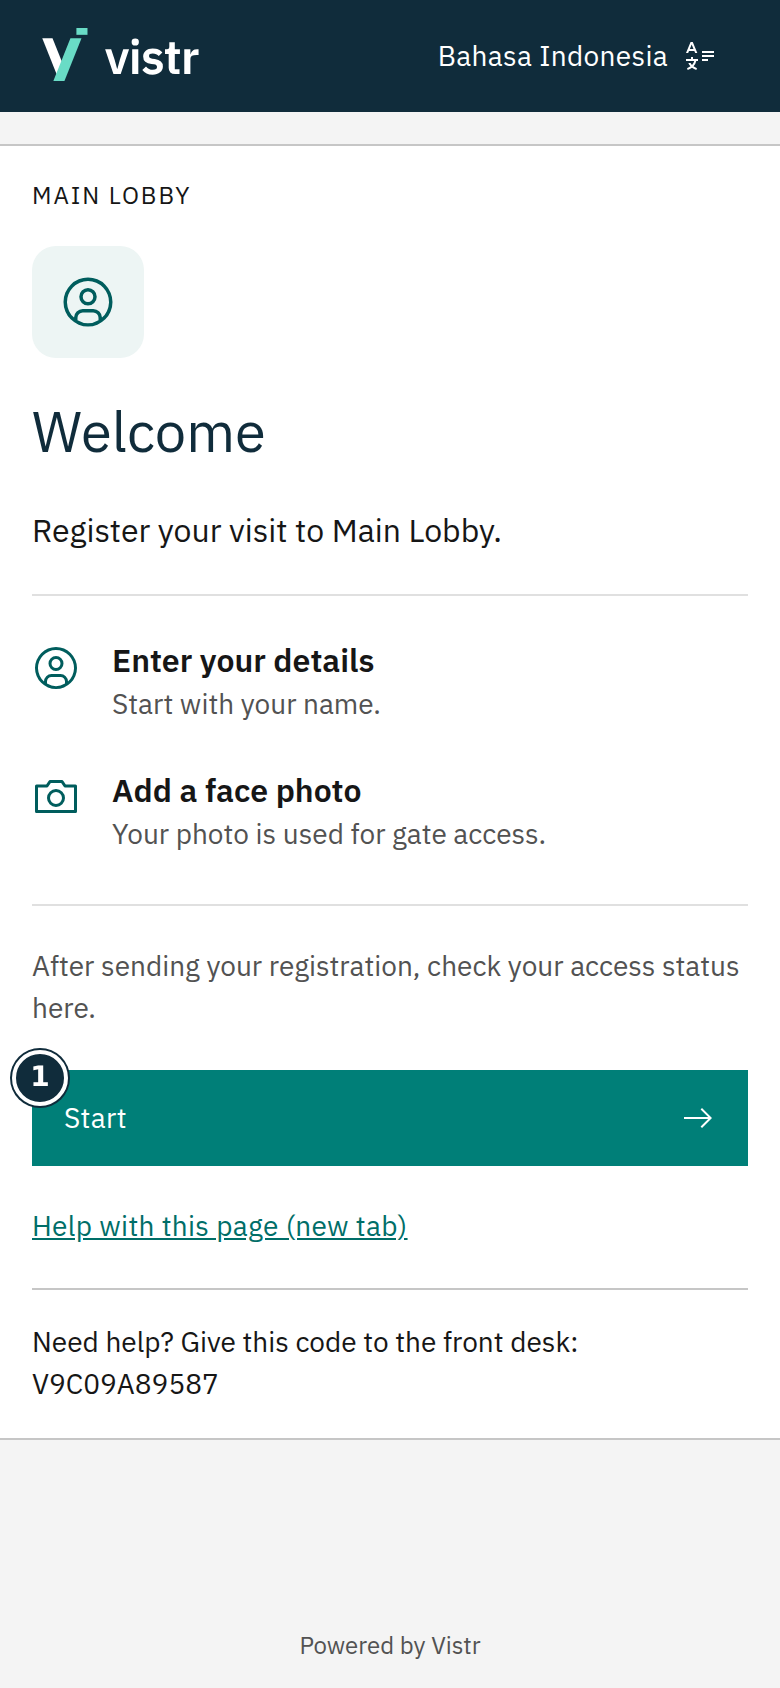
For QR registration, scan the place QR. Check the place name, choose your language, then select Start.
 Enlarge image
Figure 1. Check your destination before selecting Start. - Start
Sample data · Guest · 2026-10-05 · 780 × 1688 px
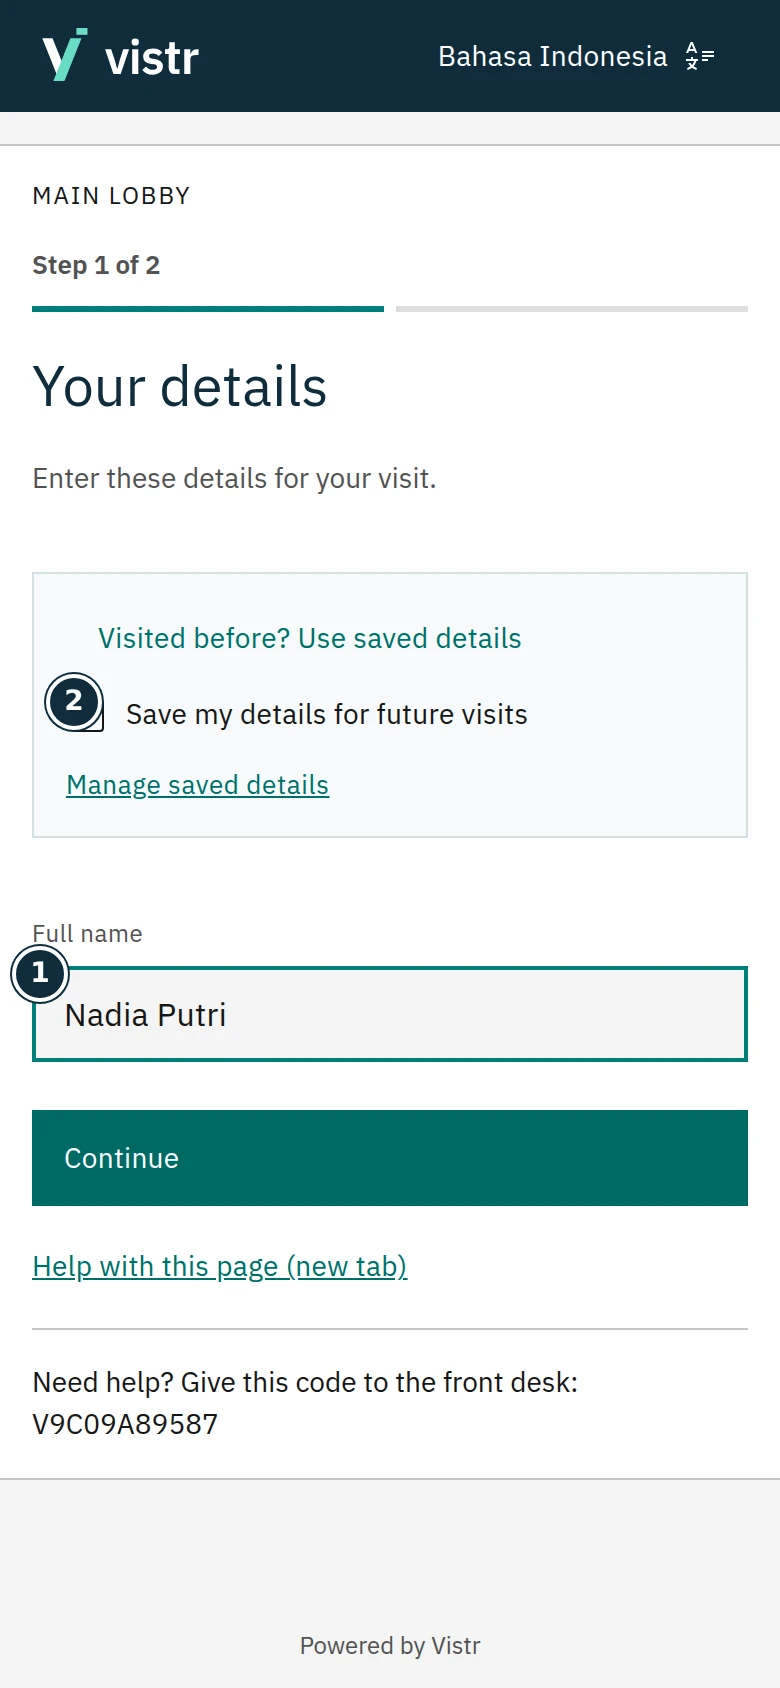
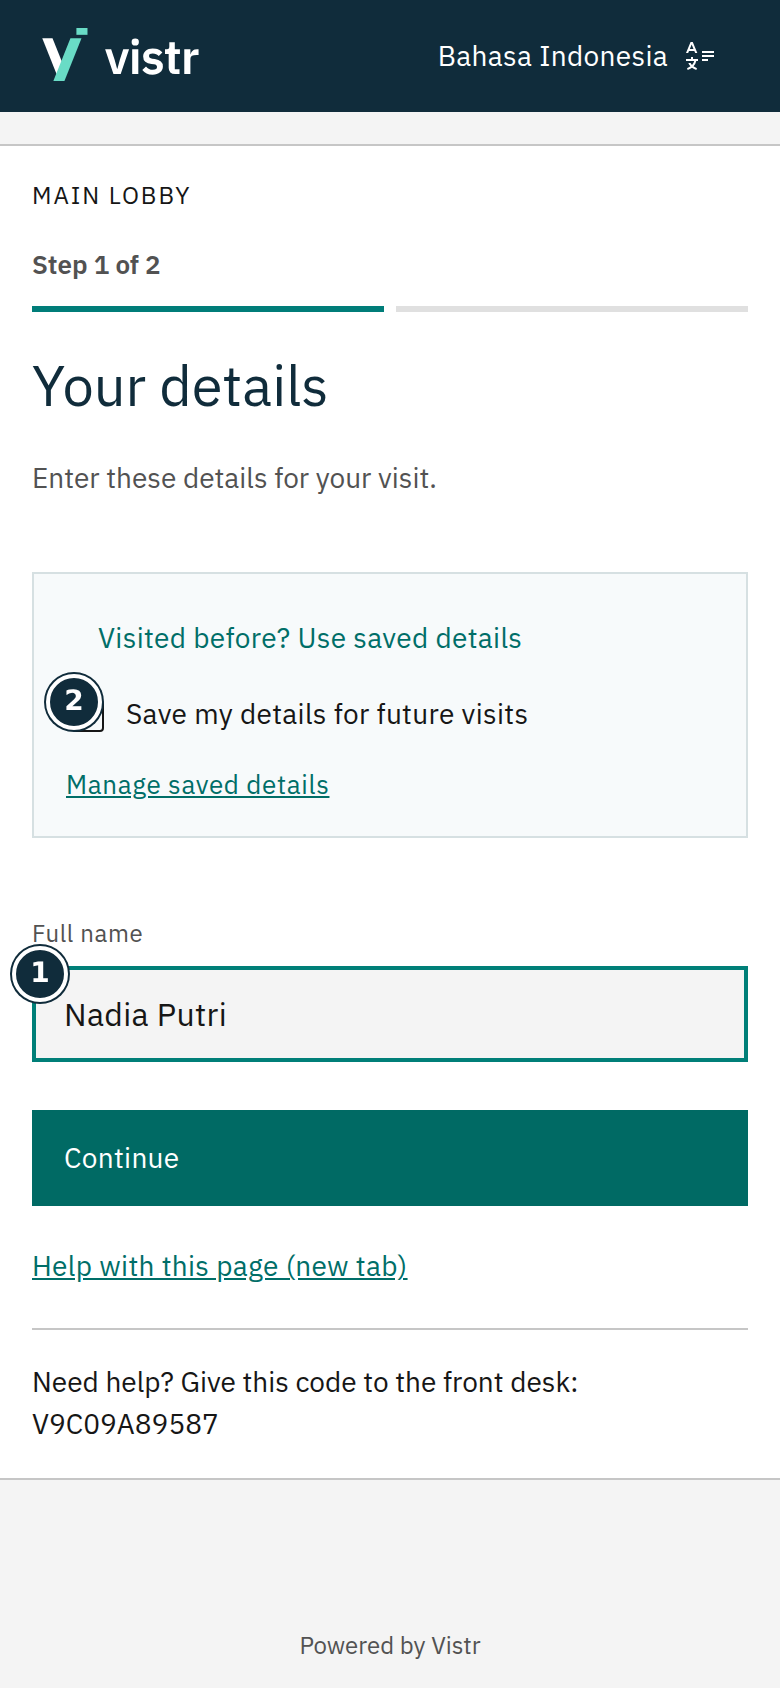
Enter your name in Your details. Complete the contact and other fields shown. Required information follows the place settings.
 Enlarge image
Figure 2. Enter your name. Saving details for another visit is optional. - Full name
- Save my details for future visits
Sample data · Guest · 2026-10-05 · 780 × 1688 px
Continue to Face photo. Take or upload a clear photo. If a document is requested, follow the instructions shown.
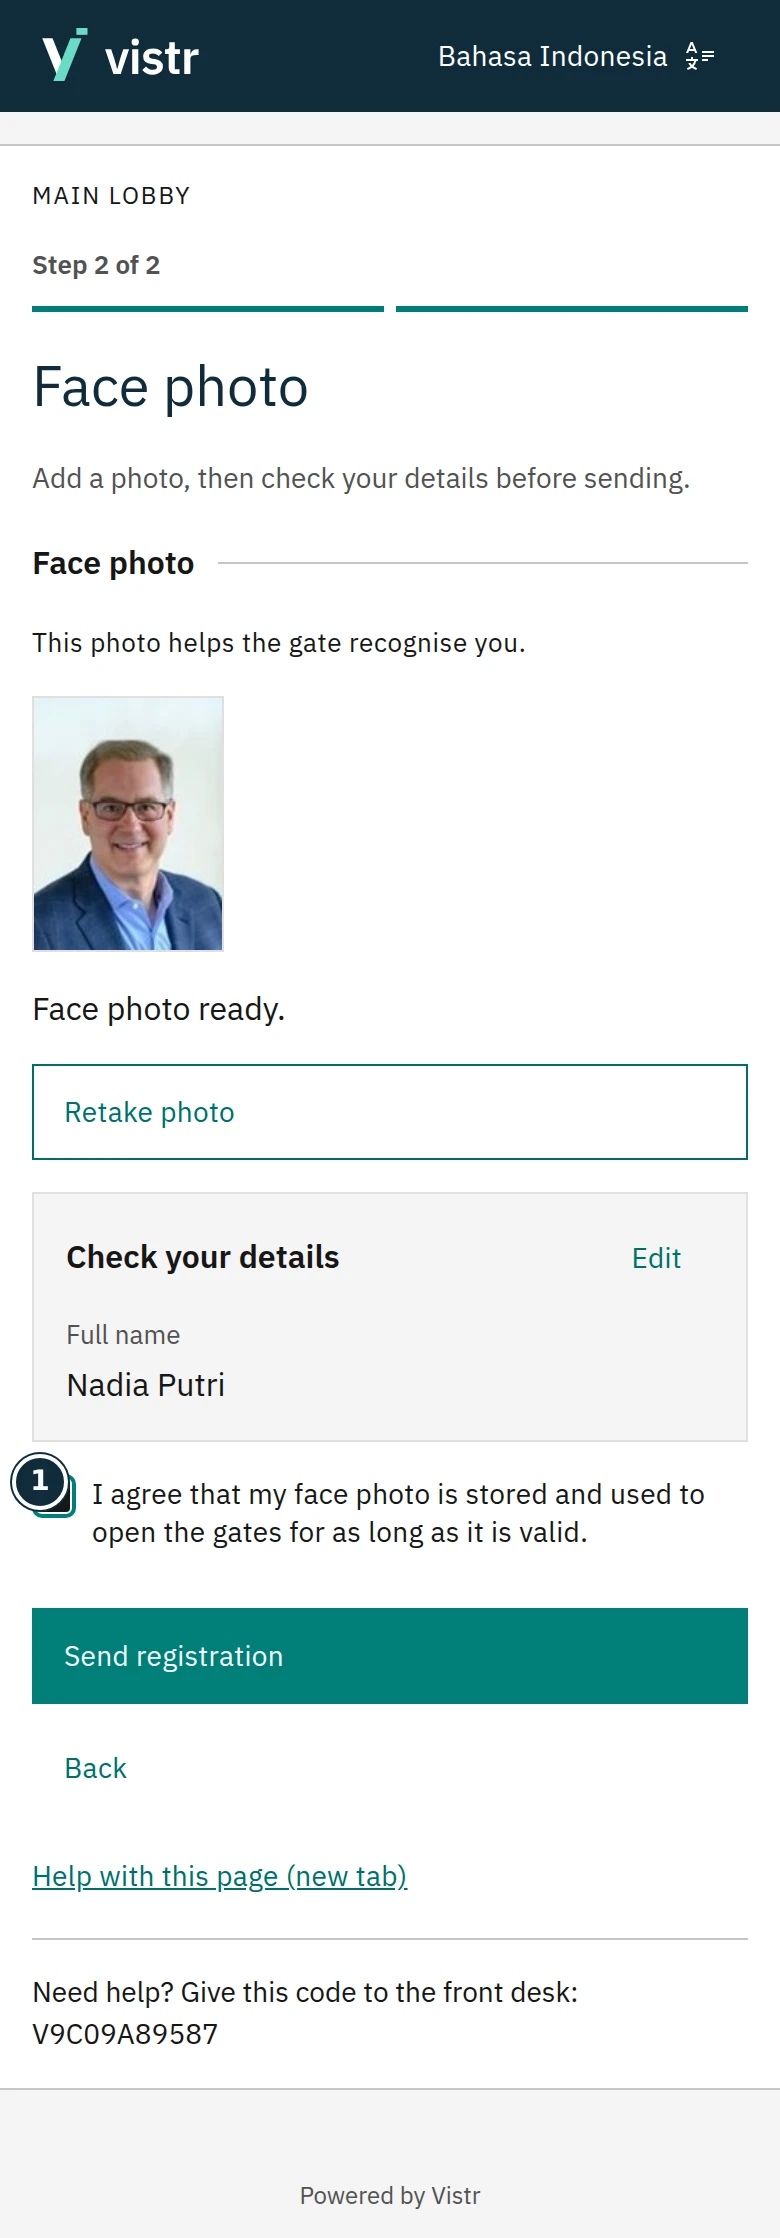
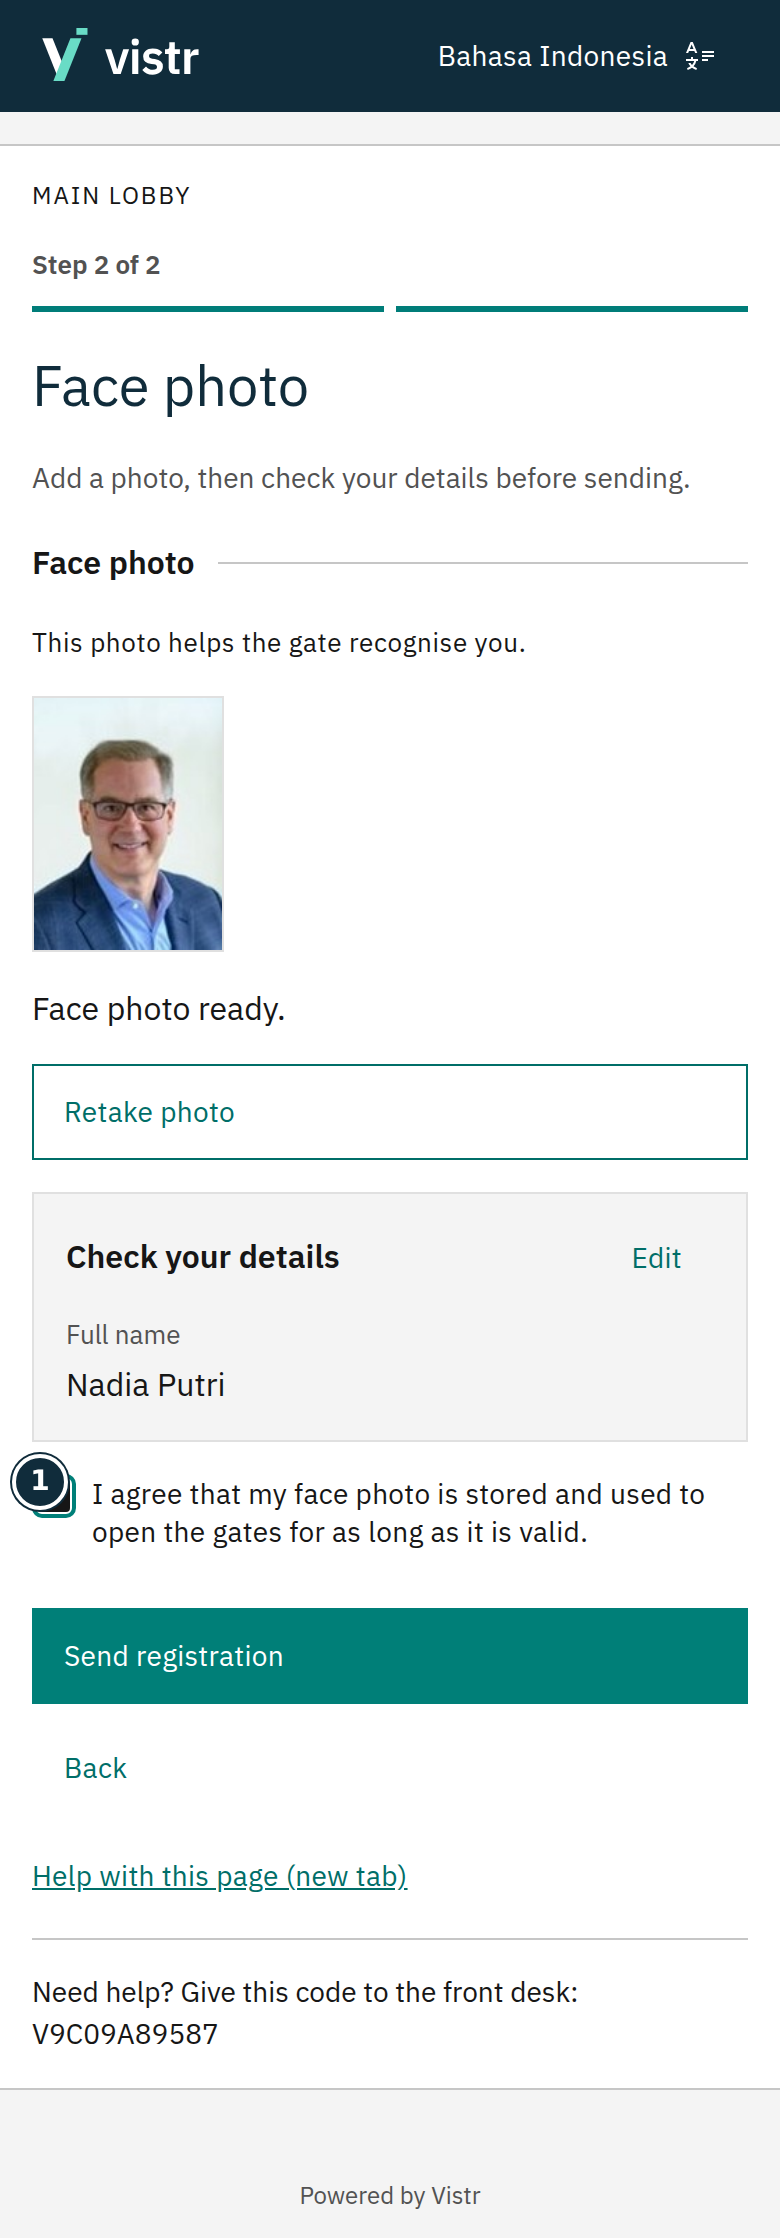
Check the summary. Select Edit if needed, read the photo consent, then select Send registration.
 Enlarge image
Figure 3. Review your photo and consent before sending. - I agree that my face photo is stored and used to open the gates for as long as it is valid.
Sample data · Guest · 2026-10-05 · 780 × 2238 px
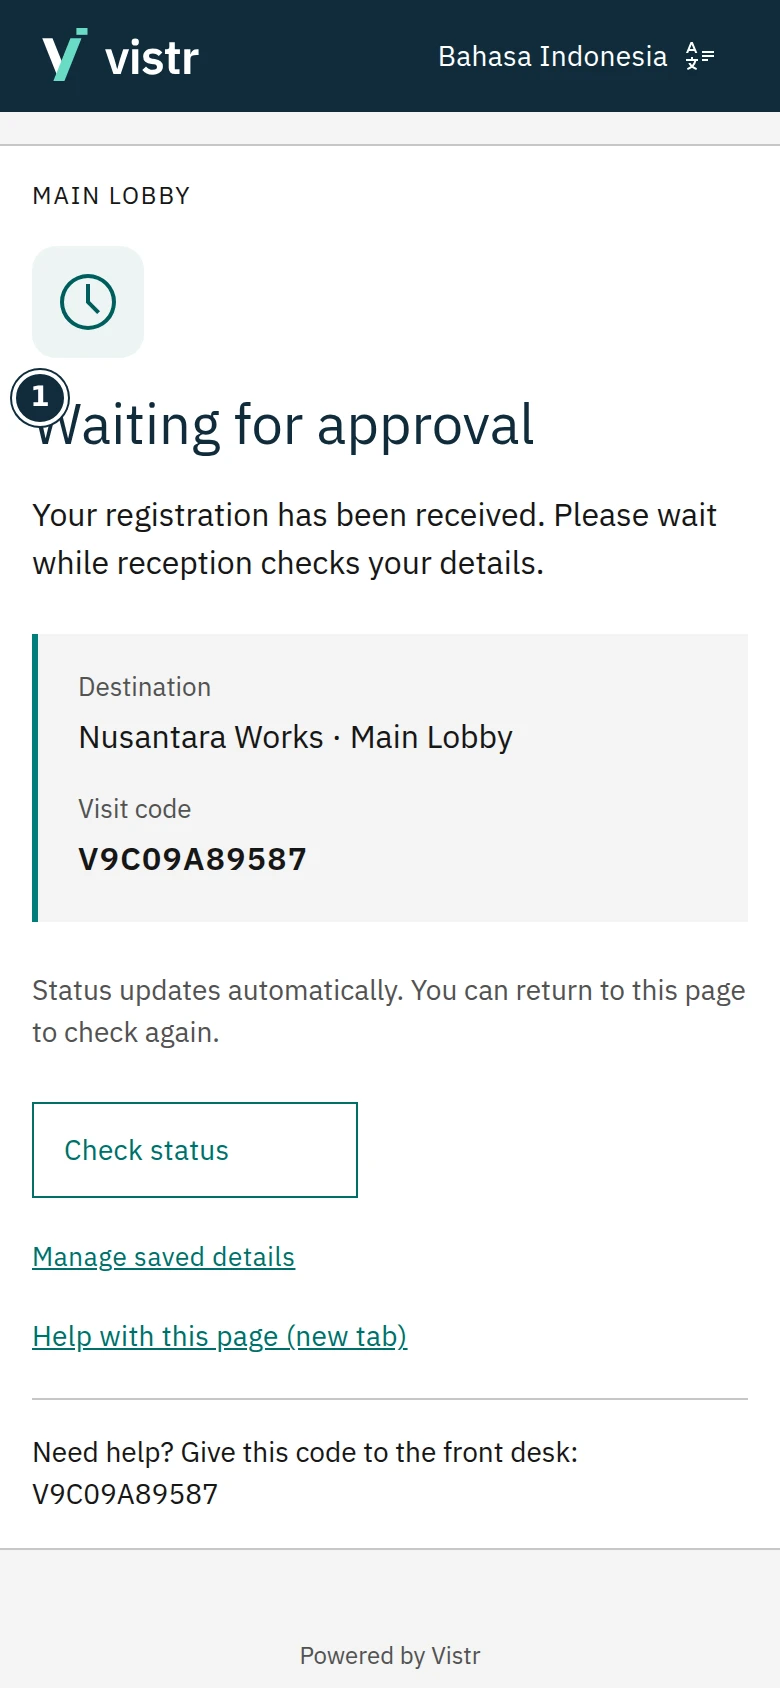
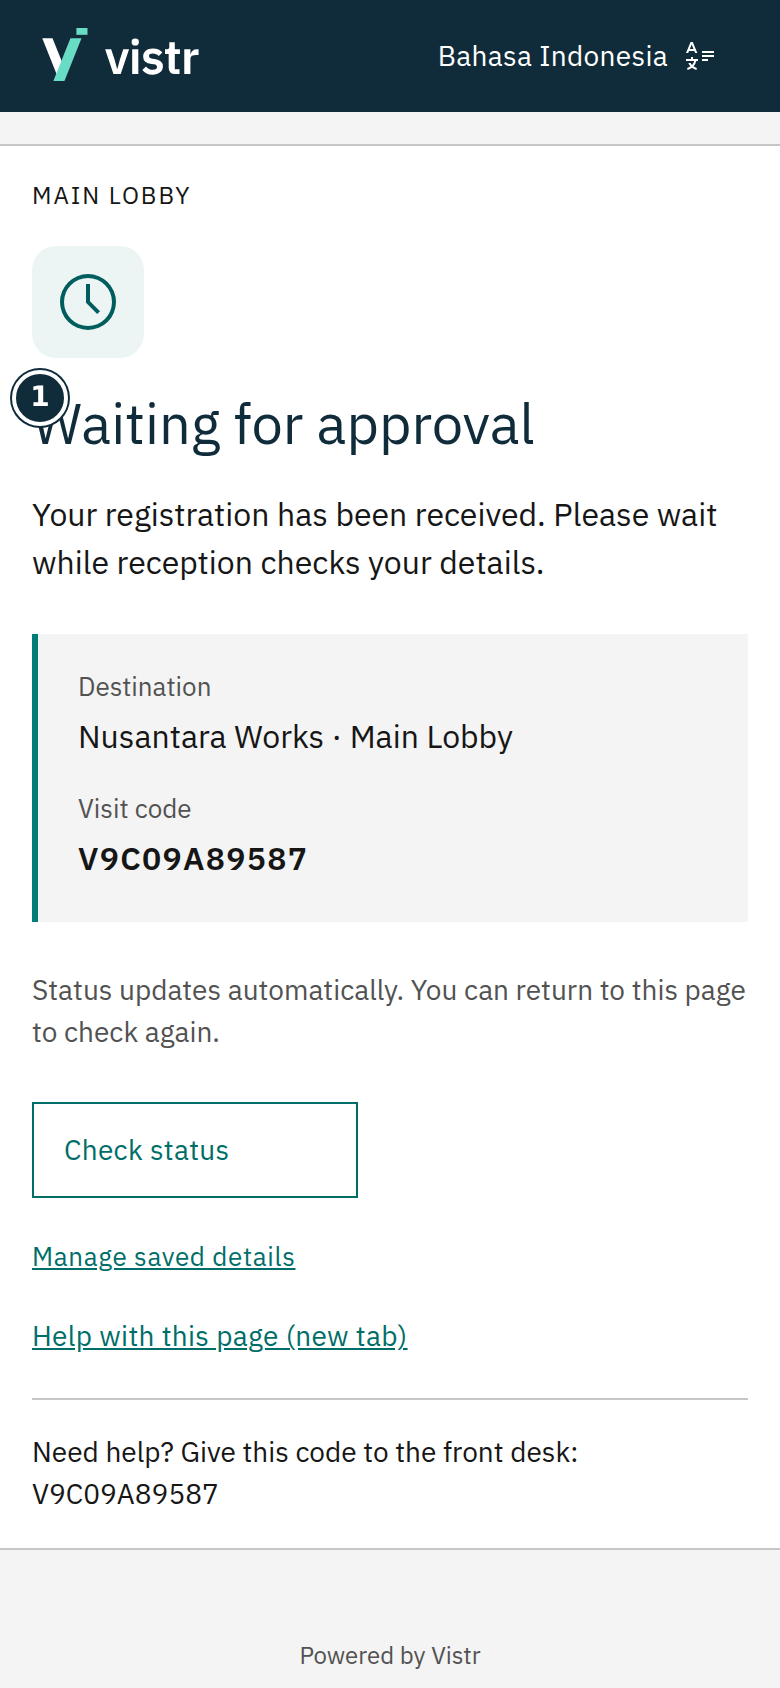
Keep the status page open. Follow the gate instructions once access is ready.
 Enlarge image
Figure 4. Waiting status does not confirm gate access. - Waiting for approval
Sample data · Guest · 2026-10-05 · 780 × 1688 px
What to enter and why
| Field | When needed | Purpose | Example |
|---|---|---|---|
| Full name | Required | Helps staff identify your registration. | Nadia Putri |
| Mobile and email | As required by the place | Complete the fields shown. Email verification for a saved profile has a separate purpose. | 0812… / nadia@example.test |
| Face photo | Required in this flow | Used for face access after approval. | Your own face, well lit and unobstructed |
Expected result
The status page confirms submission and explains the next step. Wait for ready access and the valid visit time before going to the gate.
If something goes wrong
Camera will not open
Check the browser camera permission. Use Choose photo when available; ask reception for help if it still fails.
Details need a correction
Before sending, return to Your details or use Edit in the summary. After sending, ask staff to review the same visit.
If you received an invitation
Open the invitation link. Complete Visit details, then ID and photo. At Review and send, check your information and select Send visit details. The invitation continues the prepared visit; you do not need to scan a place QR to create another visit.
After sending
A submitted registration is not always approved. The place may use automatic approval or staff review. The registration QR does not open the gate.